December recipe: Winter chicken hotpot
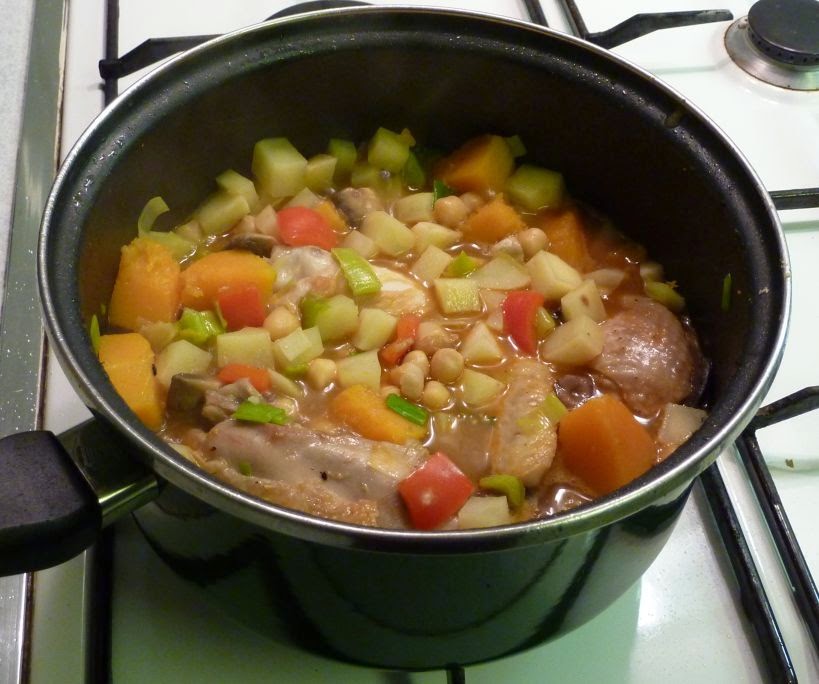 |
| Winter chicken hotpot |
This casserole
is warming, easy to make, and a versatile user-up of odds and ends of
vegetables. In this version I’ve used chicken pieces, although you could also make
it with leftover turkey if you have a lot of turkey to use up after the Big
Day. It’s a complete meal cooked in one pan, so the washing up is minimal, and
if you use tinned pulses it will take under an hour to make.
You
can vary the vegetables as you choose, depending on what you like and what you
happen to have available. Carrot, parsnip, turnip, swede* and cooking apple
would all be quite at home. Similarly, you could use butter beans or haricot
beans instead of chick peas. It’s the
sort of recipe that’s more of a general guide than a set of specific
instructions, and will probably be different every time you cook it. Here’s the
version I made the other day, in the middle of a busy week.
Winter chicken hotpot (serves 2)
2 oz
(approx 50 g) dried chick peas, or twice the weight of tinned chick peas
Two
chicken pieces (wings, drumsticks or thighs all work well)
8 oz (approx
250 g) butternut squash
4 oz
(approx 125 g) leeks
Half
a red pepper
2 oz
(approx 50 g) mushrooms
1
small onion
1
clove garlic
Approximately
0.25 pint (approx 150 ml) water
1 teaspoon
paprika
1
teaspoon medlar jelly** (optional)
1 lb
(approx 450 g) potatoes
Soak
the chick peas in cold water overnight. Rinse the soaked chick peas three or
four times, then put them in a saucepan, cover with cold water, bring to the
boil and then simmer for about 1 hour to 1 hour 15 minutes until tender. If
using tinned chick peas, follow the instructions on the tin.
If
using chicken wings, halve them at the ‘elbow’ joint. This is quite easy with a
sharp and strong cook’s knife. I find it easier to cut just on the lower side
of the joint, where the wing has two small bones instead of the single thick
bone in the upper part of the wing.
Peel
the butternut squash, scoop out the seeds in the core, and cut the rest into
chunks about 1.5 - 2 cm (0.5 - 1 inch) cubed.
Trim,
wash and slice the leeks.
Remove
the seeds from the red pepper and cut into pieces about 1.5 cm (about 0.5 inch)
square.
Peel
the mushrooms. Quarter them if small, or slice them if large.
Peel and
chop the onion. Peel and crush the garlic.
Peel
the potatoes and chop them into dice about 1 cm (about 0.5 inch) cubed.
Brown
the chicken pieces in cooking oil in a large saucepan over a medium heat.
Add
the chopped onion, squash, leeks, pepper and mushrooms. Fry until the
vegetables are starting to colour. Stir in the crushed garlic.
Add
the cooked chick peas and diced potatoes, along with the water, paprika and
medlar jelly. Season with salt and black pepper.
Bring
to the boil, then reduce the heat and simmer for 30-40 minutes until the
chicken and vegetables are all cooked. Stir from time to time, especially
towards the end of the cooking time, as the potatoes tend to stick to the
bottom of the pan when they are nearly cooked. If it starts to get dry, add a
bit more water.
*I
believe previous discussions here established that the root vegetable that’s
called ‘swede’ in the UK is called ‘rutabaga’ in the US
**Recipe for medlar jelly. Crab-apple jelly or redcurrant jelly work
equally well.


